In this tutorial, we will learn how to self-host your notes in Git on a home server and access them with NotesHub from the internet completely for free (assuming that you already have everything from the prerequisites section)!
I would like to start by answering the question of why you may want this. Well, some people may not completely trust their data to be hosted by big companies and they also can change policies on how they handle your data, also this could be just a cool home project. If you are on board, let's dive in.
We'll use Orange Pi with Ubuntu installed as a home server, but any single-board computer (Raspberry Pi, etc) or Debian-based Linux server should work. Depending on your specific setup some commands may vary. It's important to follow the order of steps because some depend on each other.
Prerequisites
- Home server: a single-board computer (Orange Pi, Raspberry Pi, etc.) or Desktop computer
- Linux OS: preferably Debian-based like Ubuntu, Raspberry Pi OS, etc.
- Domain name: for demonstration in this tutorial, we will use
git.example.combut you should replace it with something you own
Setup Git server
In our setup, we will use Gitea as it's a very popular open-source solution for self-hosting a Git server and it will be very familiar to GitHub users.
Install a database
You need a database to use Gitea. Gitea supports PostgreSQL (>= 12), MySQL (>= 8.0), MariaDB (>= 10.4), SQLite (builtin), and MSSQL (>= 2012 SP4). For this installation, we will use PostgreSQL.
Install PostgreSQL by using the following command:
sudo apt install postgresqlOpen PostgreSQL terminal to create a user for Gitea:
sudo -u postgres psql -d template1CREATE USER gitea CREATEDB;To set the password for user gitea, type:
\password giteaYou will be asked to enter a password. Keep it for future reference.
Create a new database for Gitea:
CREATE DATABASE gitea OWNER gitea;Exit the PostgreSQL terminal: \q
Install Git
Check that Git is installed on the server. If it is not, install it first. Gitea requires Git version >= 2.0:
sudo apt install gitInstall Gitea
First, we start by creating a new user under which we will run the Gitea service. Use –disabled-login as we don't want to use it for login into our server. Use –gecos to allow us to set a name for the user, git:
sudo adduser --disabled-login --gecos 'Git Version Control' gitSwitch to the newly created user:
sudo su gitChange to the home directory of user git and create a new directory where we will store the Gitea binaries. We also switch to the new directory:
cd ~
mkdir gitea
cd gitea
Now we need to download the correct Gitea binaries. First, go to https://dl.gitea.io/gitea/ and pick the latest version, then find the file with the -linux-arm64 ending, since our home server is Linux-based with the processor on ARM architecture. Copy the link of the actual file, and in the command below replace GITEA_BINARY_URL with that URL:
wget GITEA_BINARY_URL -O giteaTo be able to run it as a service, we first need to give execution rights to the file for the user git.
Finally, we exit from that user:
chmod +x gitea
exit
Now we need to make sure that Gitea will be automatically launched at startup. Let's create a service file with the following command:
sudo nano /etc/systemd/system/gitea.serviceCopy the following content to the file:
[Unit]
Description=Gitea (Git with a cup of tea)
After=syslog.target
After=network.target

[Service]
# Modify and uncomment the following two properties if you have
# repos with lots of files and you get HTTP error 500
# LimitMEMLOCK=infinity
# LimitNOFILE=65535
RestartSec=2s
Type=simple
User=git
Group=git
WorkingDirectory=/home/git/gitea
ExecStart=/home/git/gitea/gitea web
Restart=always
Environment=USER=git
HOME=/home/git

[Install]
WantedBy=multi-user.target
Save the file with Ctrl+X followed by Y and then hit Enter.
If everything is correct we should now be able to enable and finally start our service:
sudo systemctl enable gitea.service
sudo systemctl start gitea.service
Configure Gitea
Now that we have installed Gitea, we can proceed with the configuration part.
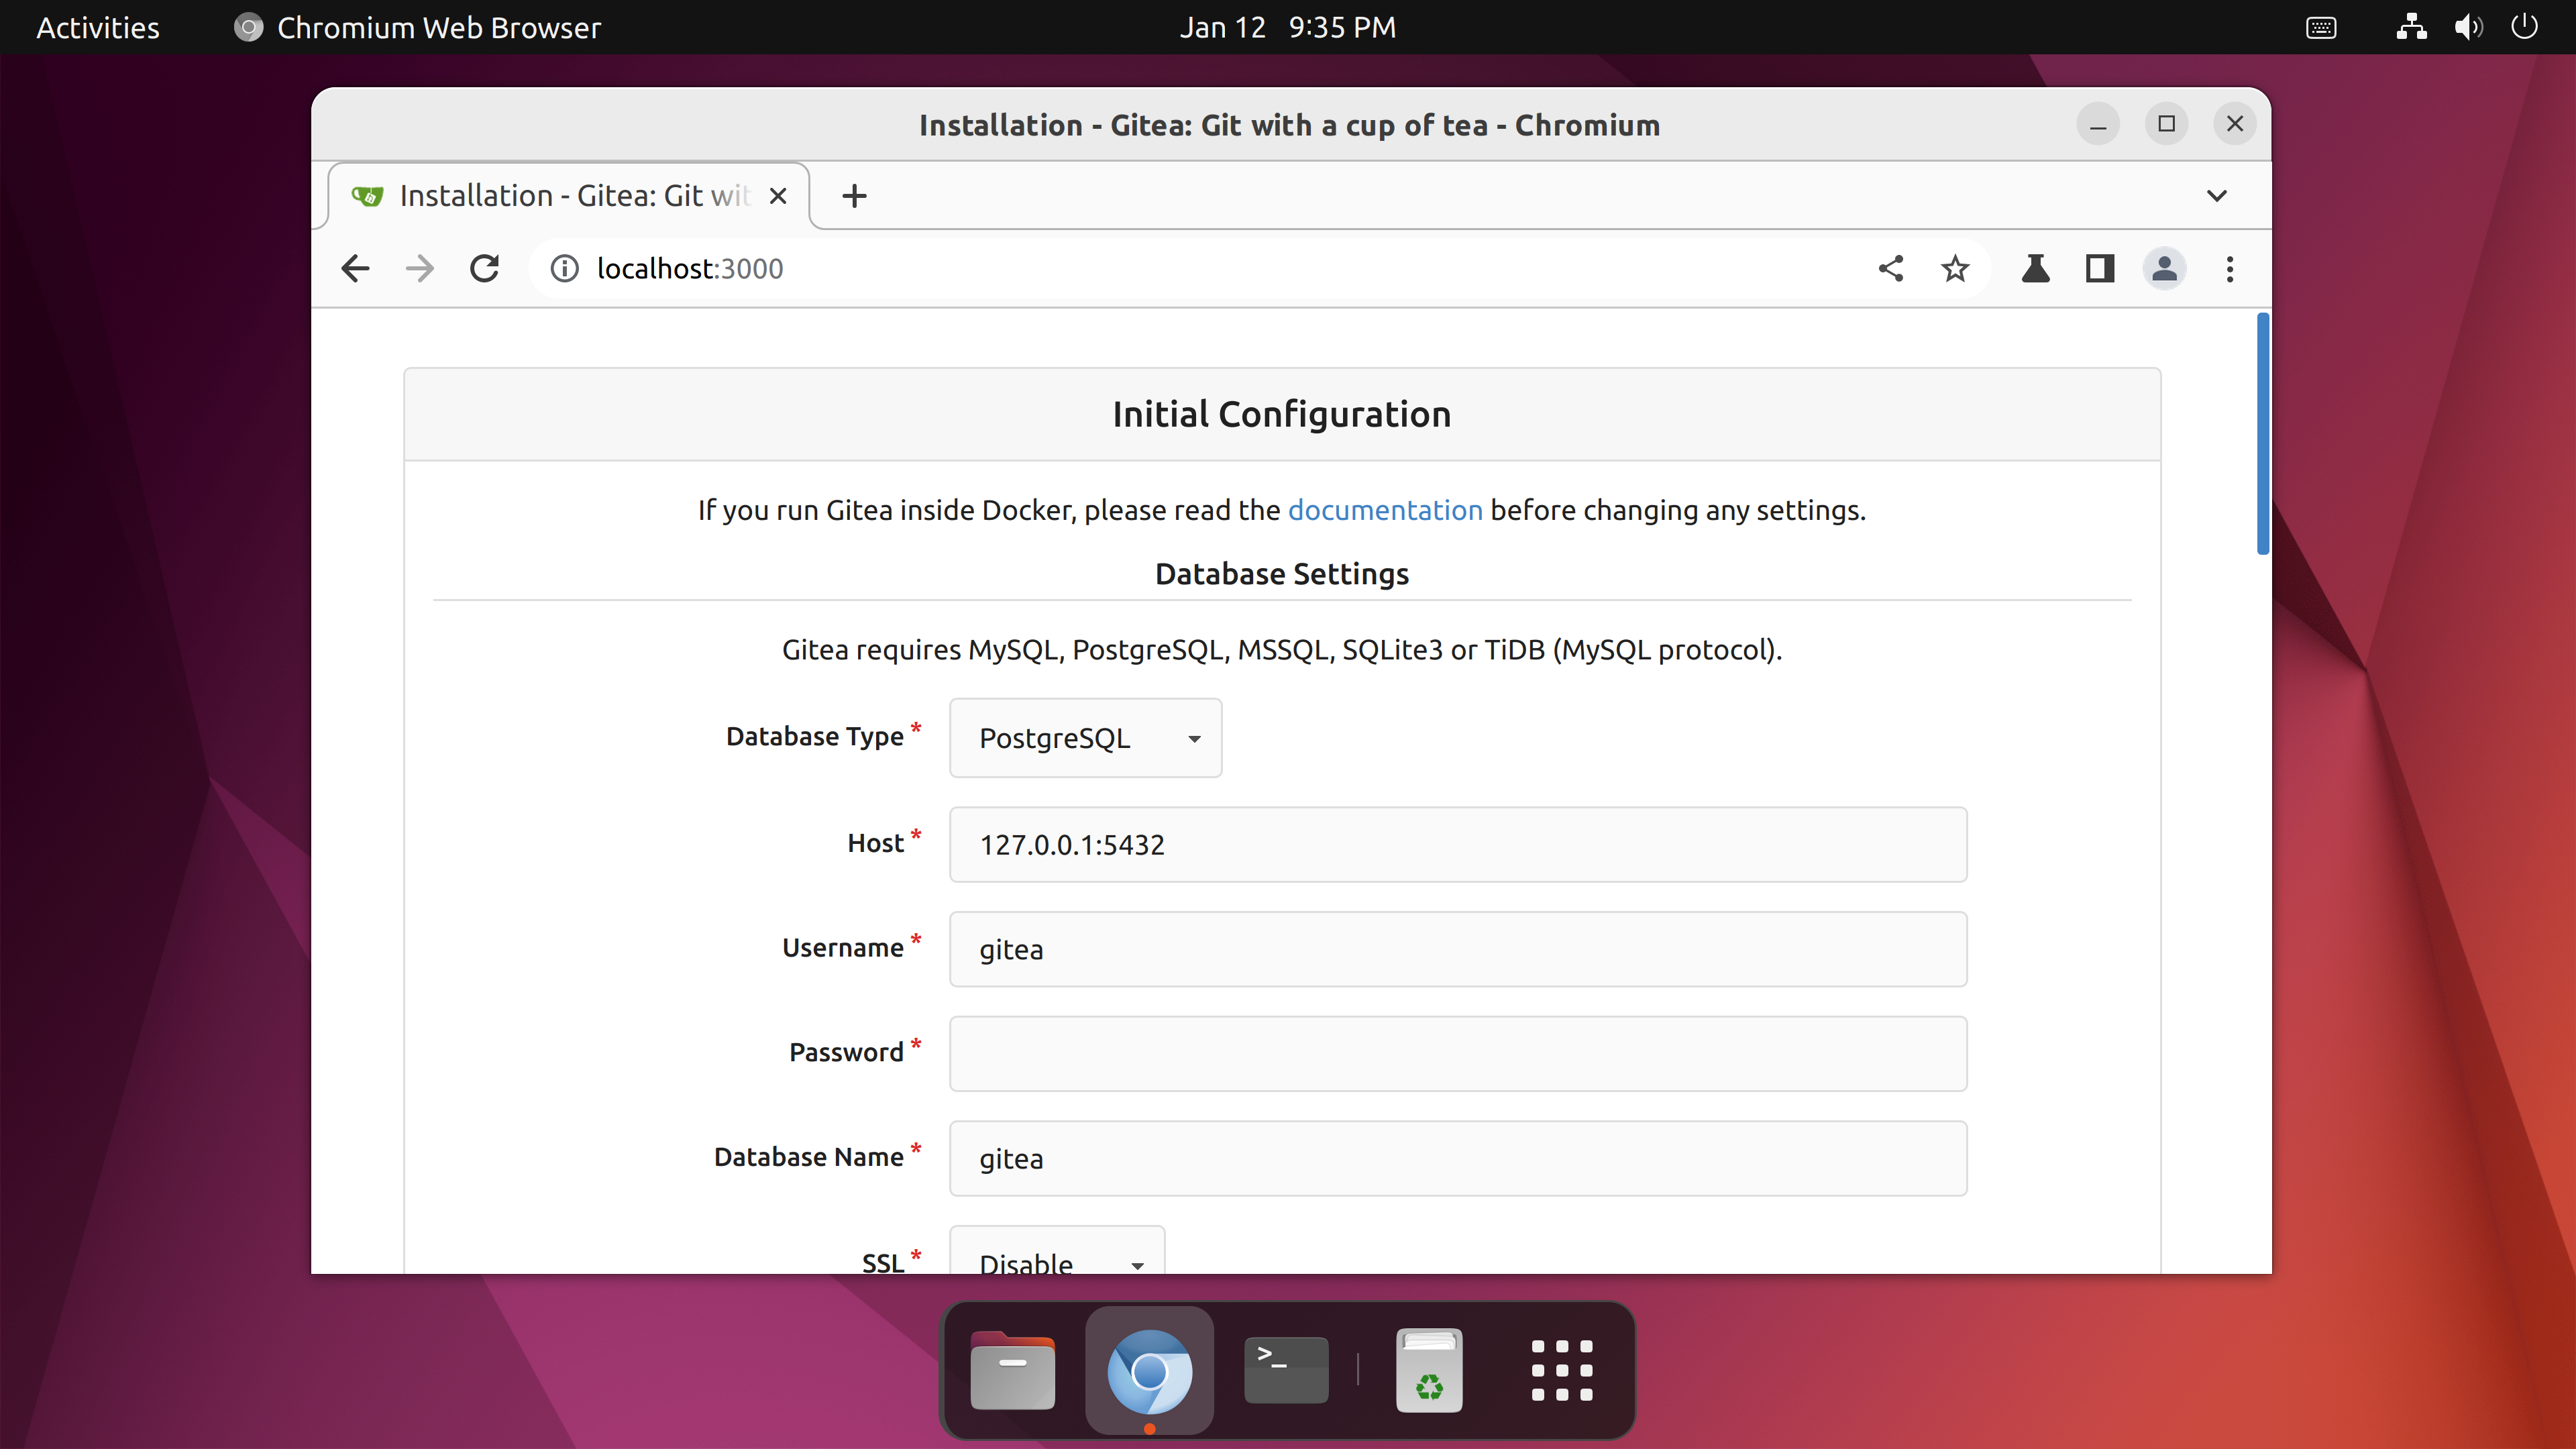
Navigate in the browser to the following URL http://localhost:3000 from your home server, and you should be greeted with the Gitea Initial Configuration screen.

If you strictly followed the instructions, it will require minimum input from you:
- Database Settings
- Database Type: choose PostgreSQL
- Password: enter the PostgreSQL user password used in previous steps
- General Settings
- Gitea Base URL: enter the intended public URL for your Git server (example:
https://git.example.com), please note that you must own that domain name - Enable Update Checker: check the option
- Gitea Base URL: enter the intended public URL for your Git server (example:
- Optional Settings
- Disable Self-Registration: check the option
- Require Sign-In to View Pages: check the option
- Administrator Account Settings: enter username, email and password for new administrative account of Gitea server
Once you have set everything, you can go ahead and press the Install Gitea button located at the bottom of the web page.
Expose Git server to the Internet
If you get to this point than your Gitea instance should be accessible from http://localhost:3000 (when navigating from home server). Our goal is to access it even outside the home. Let's continue our setup.
Port forwarding
Port forwarding is a technique that enables remote servers and devices on the internet to access devices that are on a private network. If port forwarding is not enabled, only devices on the private internal network can communicate with each other or your network. Since we want to access our notes not only from home but from any place on earth, we need to enable it.
How to do this highly depends on your network router model, so we will not be able to cover all possible variants. You would have to search for how to enable port forwarding for your particular model.
As a general idea, we want all requests for ports 80 and 443 to be forwarded to our home server in our local network. Once it's done, you can move on to the next step.
Dynamic DNS
Dynamic DNS or DDNS, is an automatic method of refreshing a name server. It can dynamically update DNS records without the need for human interaction. It is extremely useful for updating A and AAAA records when the host has changed its IP address. Since most houses don't have static IPs, this is an essential step to make sure your home server is accessible via a human-readable URL outside of the local network.
For this purpose, we will use ddclient, go ahead and install it:
sudo apt install libio-socket-ssl-perl # depended Perl module
sudo apt install ddclient
Upon installation, you will be greeted with the Configuration ddclient screen.
If your domain registrar is listed in the list, select it, otherwise choose other and follow the prompts.
Since those prompts depend on your domain registrar we will omit them here.
As a general rule, you should research how to get DDNS credentials for your particular registrar.
Also, if your registrar was not on the initial list, you would have to manually update /etc/ddclient.conf file by following the instructions here: https://ddclient.net/protocols.html.
Finally, once everything is set we can go ahead and enable the automatic startup of ddclient when booting and perform the first start:
sudo systemctl enable ddclient.service # enable automatic startup
sudo systemctl start ddclient.service # perform first start
Reverse proxy
A reverse proxy acts as a central contact point for clients and routes their requests to the appropriate backend service. It ensures that the backend service’s response is delivered to the correct client. This will allow us to access multiple services (applications) hosted on the same home server from the internet, which can be useful for future expansion.
In our case we will use NGINX, let's install it:
sudo apt install nginxBefore testing Nginx, the firewall software needs to be adjusted to allow access to the service.
Let's install ufw (Uncomplicated Firewall) package to make the appropriate configuration:
sudo apt install ufw
sudo ufw enable
Let's adjust firewall rules to enable full traffic to Nginx:
sudo ufw allow 'Nginx Full'Now we can configure Nginx to serve our Gitea service, by creating a new configuration file (replace git.example.com with your own):
sudo nano /etc/nginx/sites-available/git.example.comserver {
listen 80;
# replace domain with your own
server_name git.example.com;
location / {
client_max_body_size 512M;
proxy_pass http://localhost:3000;
proxy_set_header Connection $http_connection;
proxy_set_header Upgrade $http_upgrade;
proxy_set_header Host $host;
proxy_set_header X-Real-IP $remote_addr;
proxy_set_header X-Forwarded-For $proxy_add_x_forwarded_for;
proxy_set_header X-Forwarded-Proto $scheme;
}
}Next, let’s enable the file by creating a link from it to the sites-enabled directory, which Nginx reads from during startup:
sudo ln -s /etc/nginx/sites-available/your_domain /etc/nginx/sites-enabled/Let's reload Nginx configuration:
sudo service nginx reloadSSL certificate
To make our service more secure let's add SSL certificate to serve our requests over HTTPS protocol.
We will use Let’s Encrypt which is a Certificate Authority (CA) that provides an easy way to obtain and install free TLS/SSL certificates, thereby enabling encrypted HTTPS on web servers.
The first step to using Let’s Encrypt to obtain an SSL certificate is to install the Certbot software on your server.
Install Certbot and it’s Nginx plugin with apt:
sudo apt install certbot python3-certbot-nginxNow we can obtain an SSL certificate by running the following command:
sudo certbot --nginx -d git.example.comThen follow a few prompts and your certificate should be issued. As a bonus auto-redirect from HTTP to HTTPS will be configured alongside certificate auto-renewal.
Access notes with NotesHub
If you get this far, my congratulations, the most heavy lifting is done!
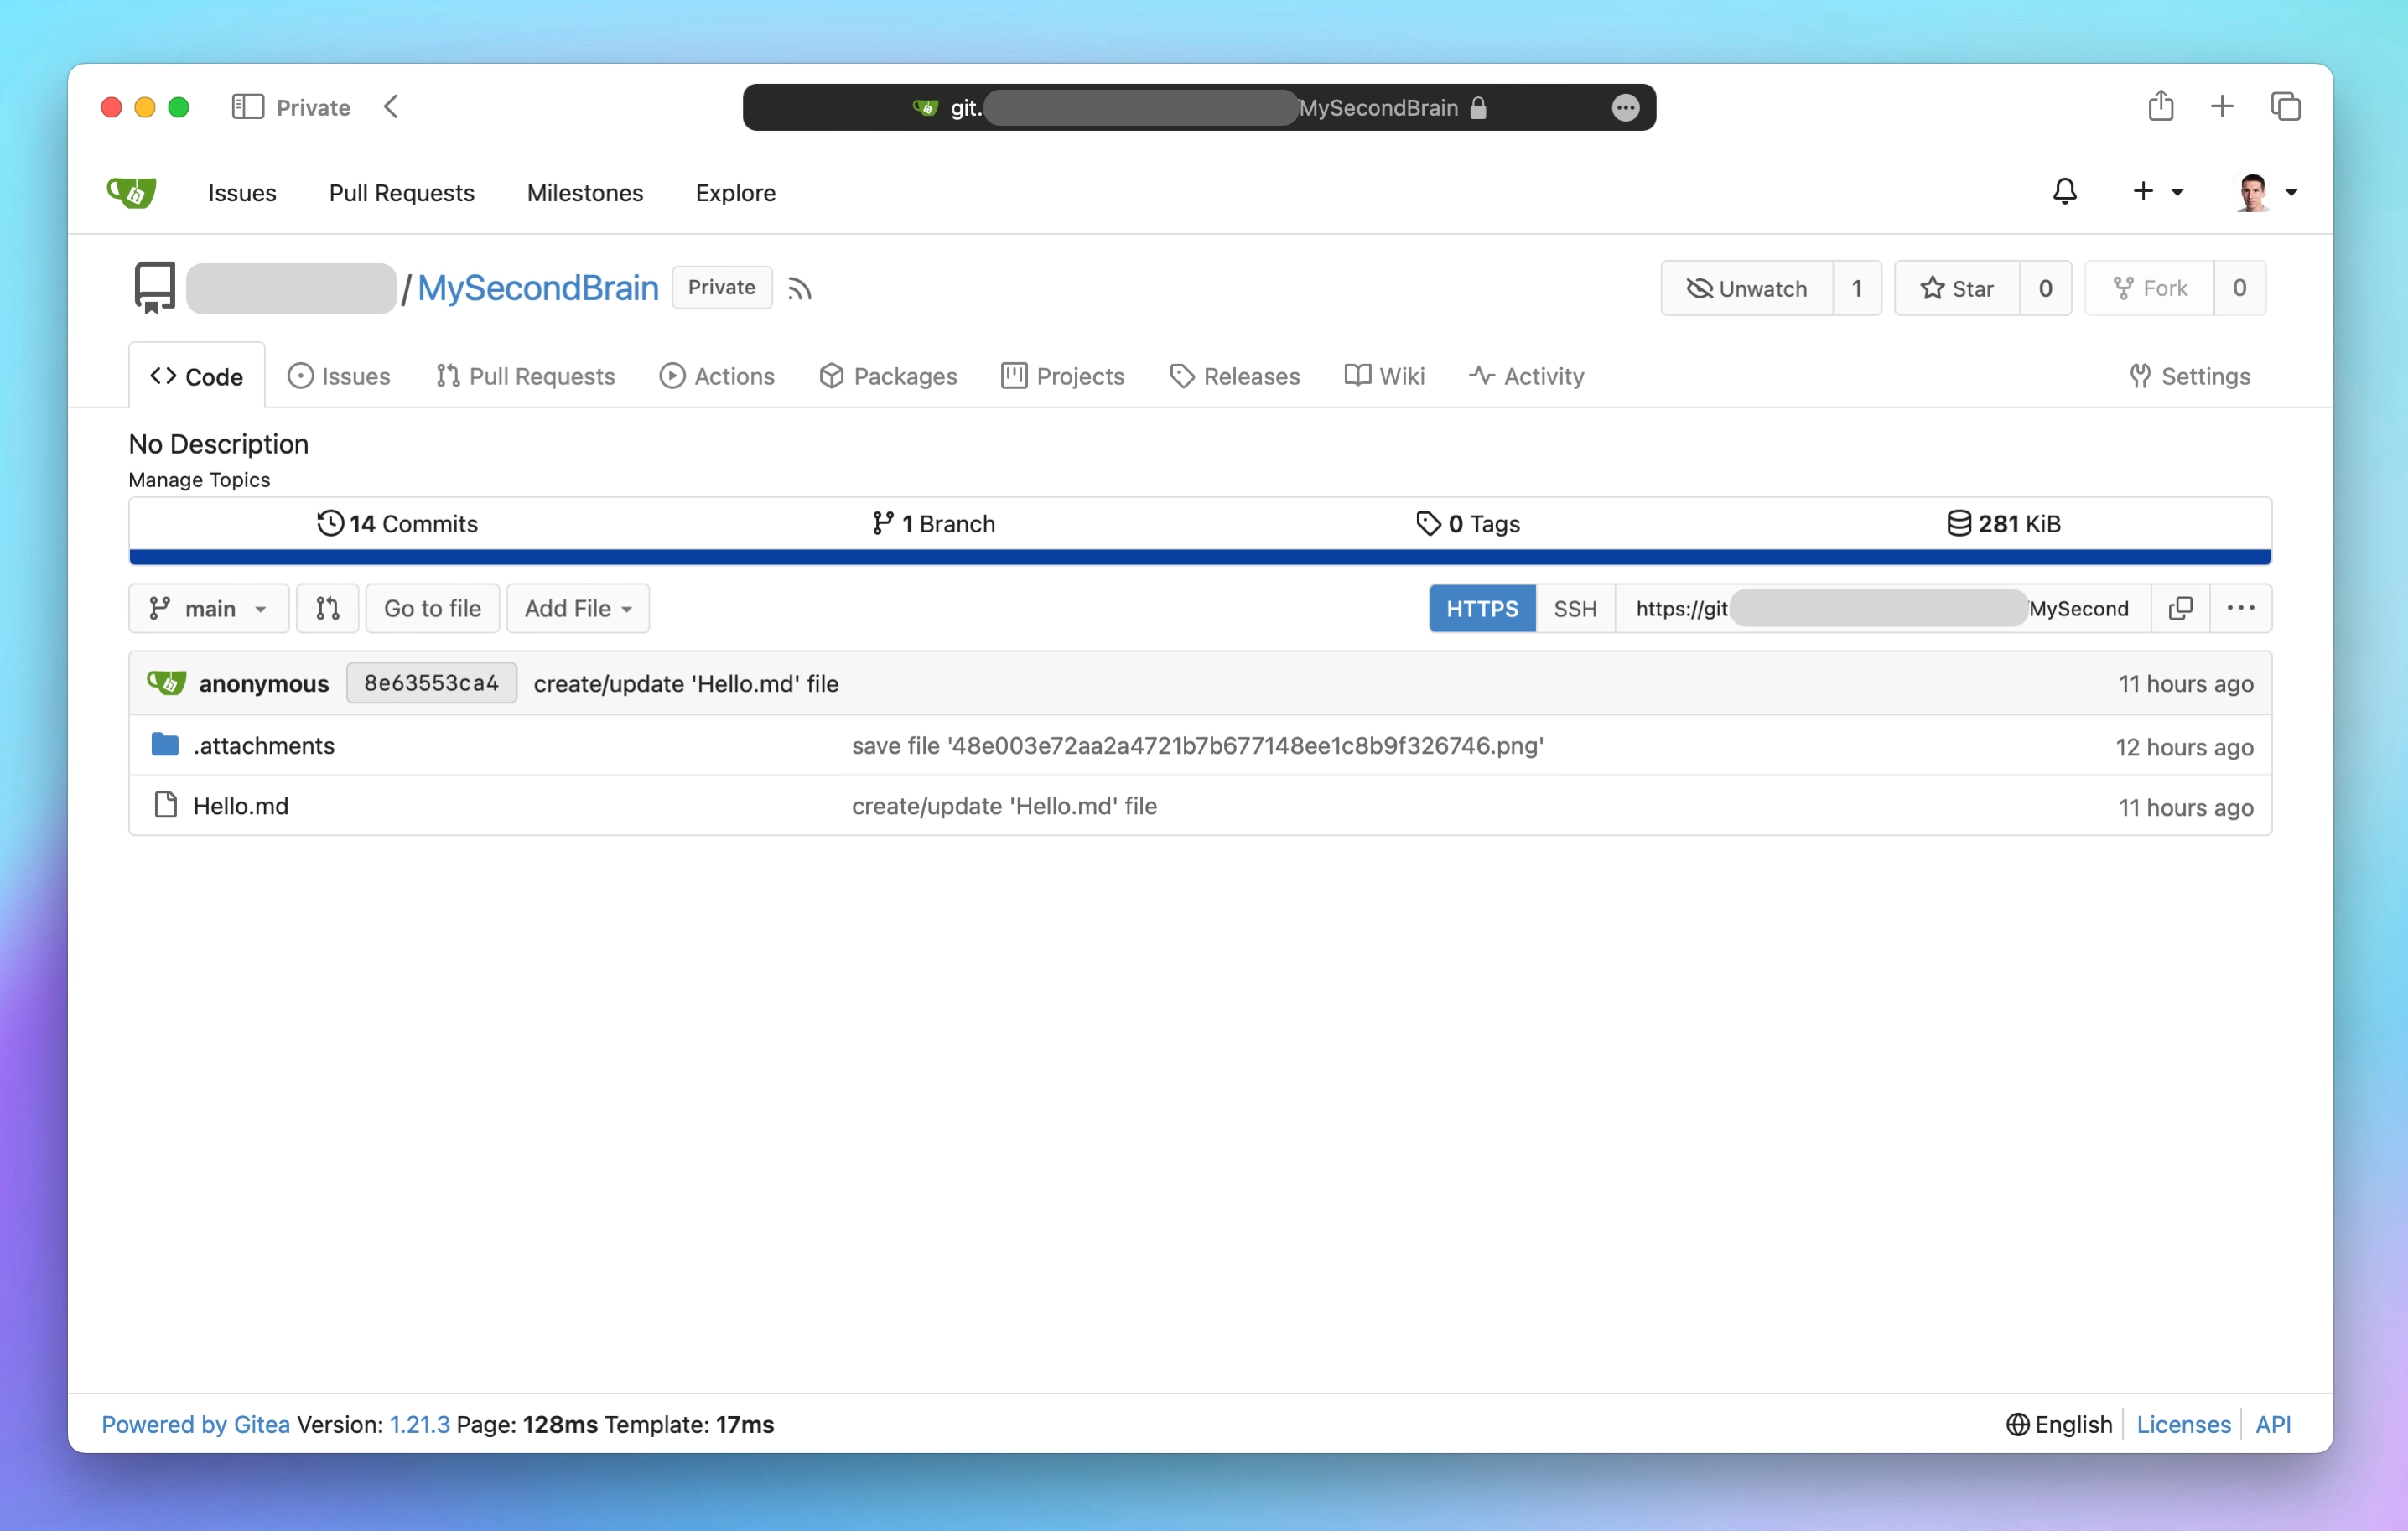
You should be able to navigate to https://git.example.com and create your first repository to store your notes.

Almost everything is ready to use it with NotesHub. Now we need to create app specific access token to use it instead of the admin account password. Navigate in Gitea to Settings -> Applications, choose a token name (example: NotesHub) and click Generate Token.
Please note that the Web version of NotesHub uses a proxy service when communicating with a Git server. Use desktop or mobile version of NotesHub if you want direct communication with your Gitea instance. This will ensure maximum performance and security.
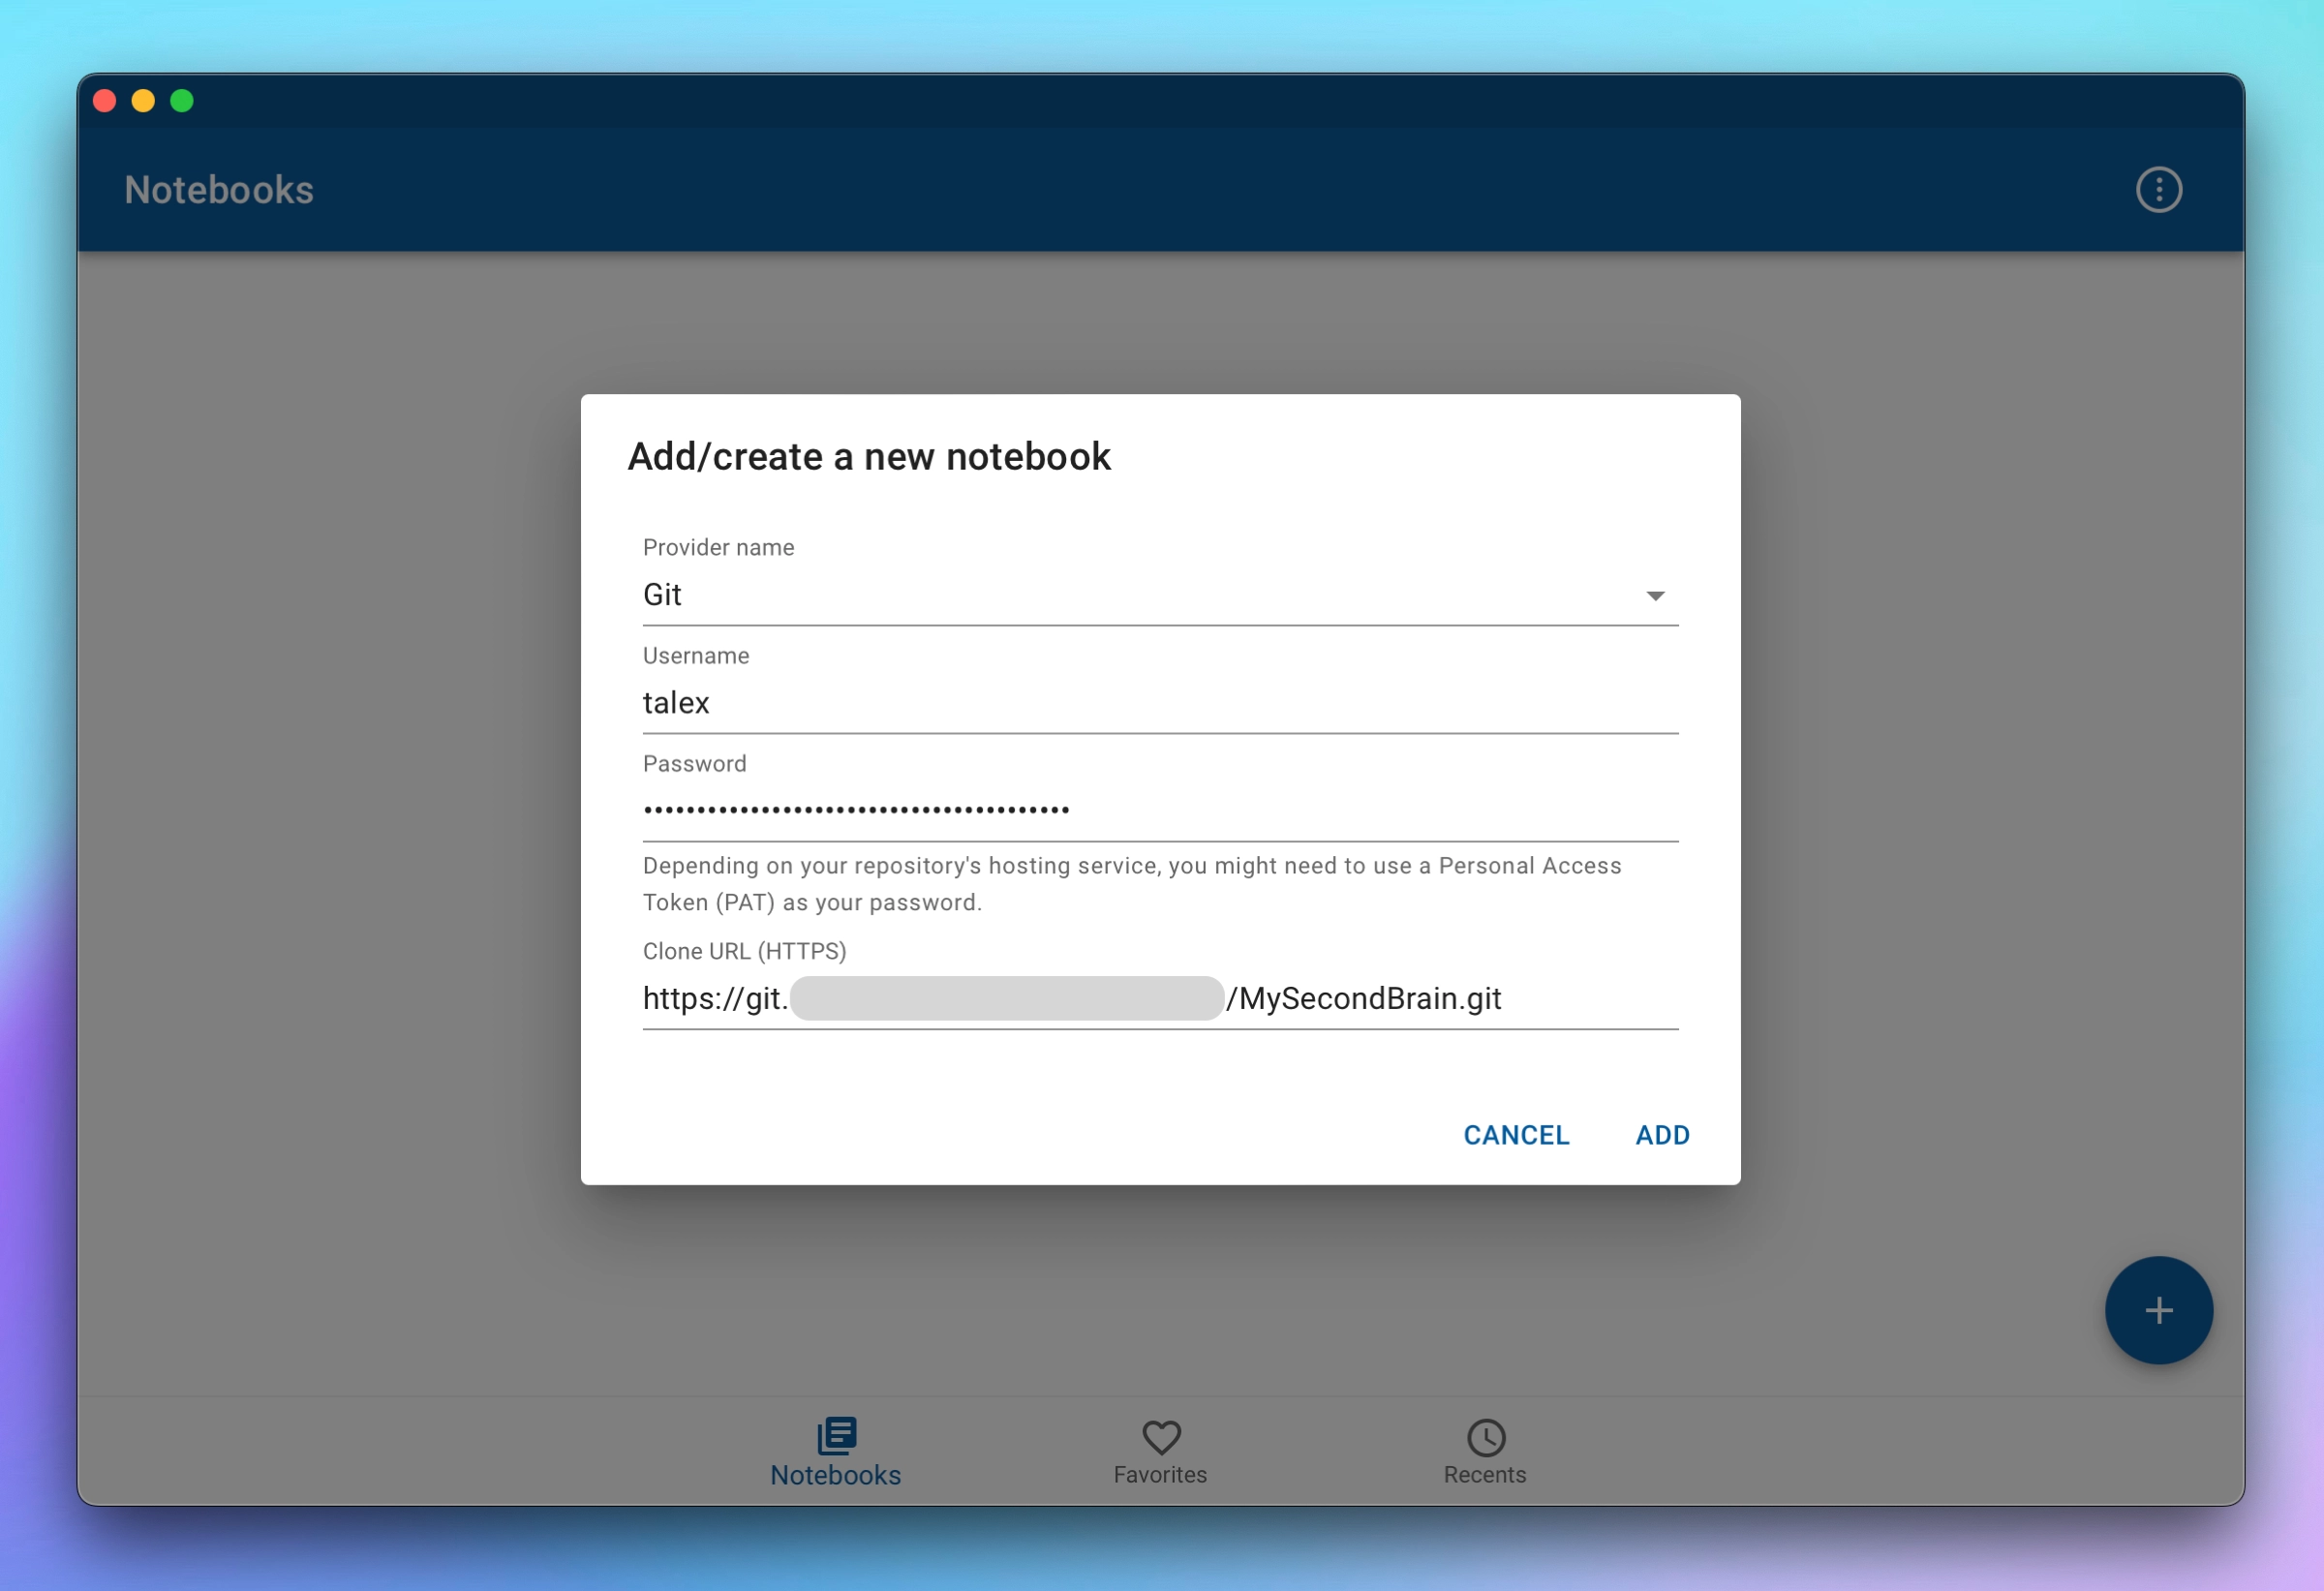
Now open NotesHub, click the "+" button to add a new notebook and choose Git provider.
- Username: could be anything since we use the access token instead of a password
- Password: specify here the newly generated access token from Gitea and keep it for future reference in case you want to add more notebooks
- Clone URL: on Gitea repository page you can find the value near the label HTTPS

Click Add and your notebook will be cloned for offline use in the app.
Now as everything is done is the right time to drink tea!
